Popcorn Removal
Flash Painting Services in SC
Is there anything more universally hated than a popcorn ceiling? If you find yourself looking up and wondering how to remove popcorn ceilings, you’re not alone. Let’s face it: they are eyesores. They’re also known as acoustical ceilings, stucco ceilings, or worse, cottage cheese ceilings. They were big in the mid to late 20th century. Builders installed the textured treatment to help absorb sound from above or cover imperfections in the ceiling. (It also helped skip a few steps and save money, since it eliminates the need to paint the finished surface.) But like many trends of the 1970s, the popcorn ceiling has fallen out of favor, and many homeowners are removing or covering the unsightly surface
If you’re tired of looking at lumps and bumps and are ready for a makeover, there’s good news. Removing a popcorn ceiling is a fairly easy DIY project if done by professionals Flash Painting Services will help you with this task, we’ll do it for you. If your ceiling needs more care than just scraping and painting, we will do that too. There are options for covering popcorn ceilings, such as wood paneling, pressed tin tiles or new drywall.
Popcorn Removal
How hard is it to get rid of the popcorn ceiling? We hate to say it, but it’s not the simplest upgrade. Getting rid of popcorn ceiling textures takes time, but it’s a job that many painting professionals are experienced in.
Our team of professional painters know how it’s done, from a safe and hassle-free removal process to smoothing ceilings after removing a popcorn ceiling and repainting for an updated, timeless finish. With this simple and straightforward interior house painting process , we can take your ceilings from outdated and dull to new and improved in no time.
Popcorn process
Removing popcorn texture from your ceilings is a great way to update the appearance of your home. The removal process can be time consuming and complicated, but with the right preparation and tools, popcorn ceiling removal can be a very rewarding home improvement project.
What is a popcorn ceiling?
A popcorn ceiling has sprayed drywall mud, Styrofoam or stucco chips embedded in the ceiling surface, giving the appearance of popcorn or cottage cheese. Popcorn ceilings can absorb noise and are sometimes referred to as acoustical ceilings. However, they are no longer a popular choice in most new homes and are difficult to paint evenly. Old popcorn ceilings can pose a health risk, as many of them contain asbestos. Before removing popcorn ceilings from your home, use an EPA-approved test kit to check for asbestos in a small area of the ceiling. Asbestos removal should only be performed by an abatement professional.
How to Remove a Popcorn Ceiling
Removing popcorn ceilings is a rewarding DIY project for homeowners looking for an affordable makeover. Before you begin this project, consider the steps you’ll need to take to remove the popcorn texture from your ceilings.
- Prepare the area. We start by removing all the furniture from the room, then glue plastic sheeting to the surrounding walls and doors. We make sure to cover electrical outlets and vents. If you have ceiling fans or light fixtures that could be damaged or soiled during the removal process, consider disassembling them or covering them with plastic. Since we will be spraying the ceiling with water, the power in the room we are working in should be temporarily turned off to avoid the risk of electrical shock.
- Spray the ceiling surface. We will use a spray bottle or garden sprayer filled with warm water to lightly dampen the ceilings, being careful not to soak the ceiling as too much moisture could damage the drywall under the popcorn texture.
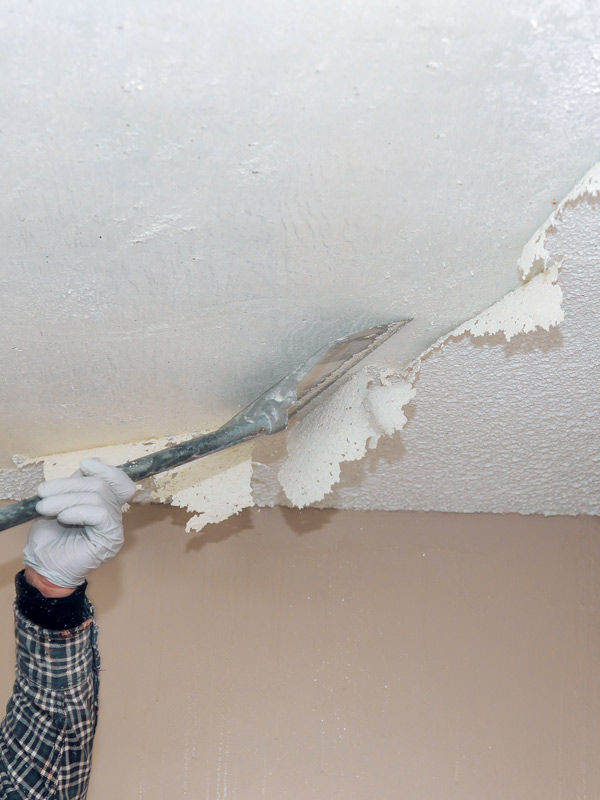
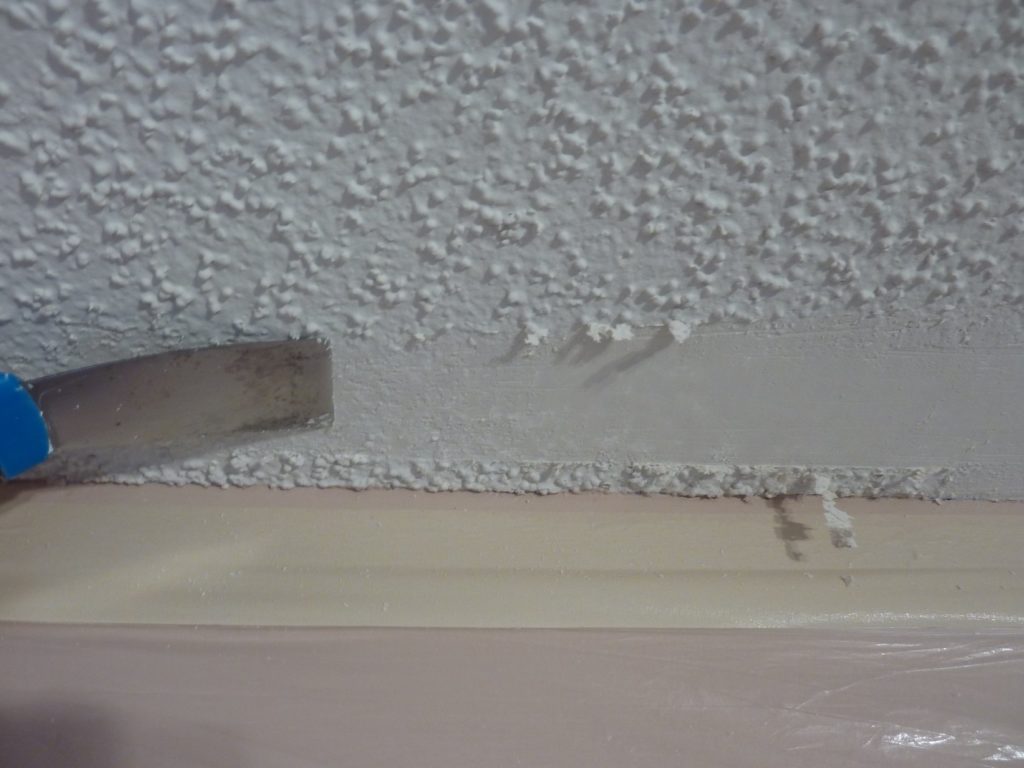
- Scrape the ceiling . Once a small section has been lightly sprayed, we will begin scraping. Holding the scraper at an angle , working in a straight line to avoid puncturing the smooth ceiling below. Repeat the process in sections four square feet at a time until the entire ceiling is smooth.
- Repair any dents. Once the entire ceiling has been scraped, use a putty knife to repair any imperfections and grooves with joint compound or putty.
- Sand patched areas. The repaired areas and any other rough spots will be lightly sanded to ensure that the entire ceiling is smooth.
- Paint the ceiling smooth. Finally, we will pour some paint into the paint tray and then use an angled brush to paint the edges where the ceiling meets the walls. Then we will use a rotary brush to apply a new coat of paint. Allow the paint to dry completely before applying more coats, if necessary.